
Last updated 8 Oct 2026
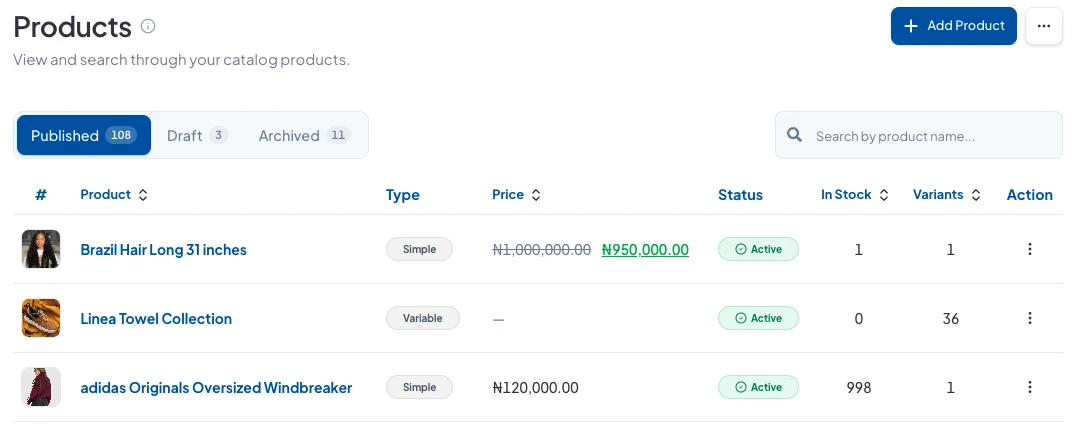
Every product you sell, online or at the counter, starts on the Products page. This guide covers both kinds: a product with one price, and a product that comes in options like size or colour.
1. Open Add Product
In your dashboard, go to Products → Products and click Add Product at the top right.
2. Name it and choose the product type
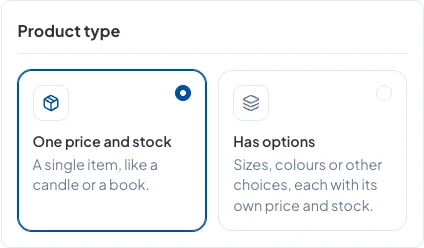
Under Basic information, enter the product's Name and, if you like, a Description. Then choose a Product type:
- One price and stock: a single item, like a candle or a book.
- Has options: sizes, colours or other choices, each with its own price and stock. This is selected by default.
3. Set the price and stock
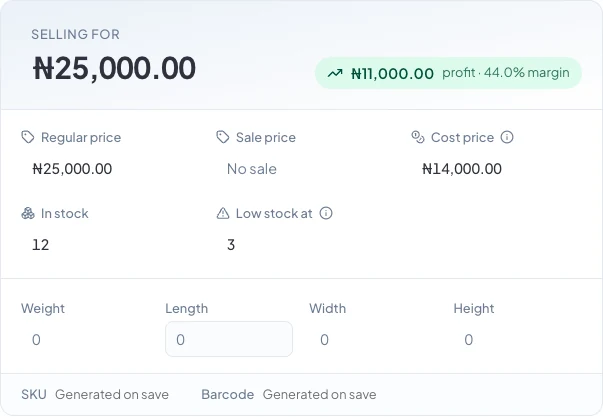
For a product with one price, click each field to fill it in: Regular price, Sale price (leave it on No sale if it isn't discounted), Cost price, In stock and Low stock at. Weight and size are optional.
Once you add a cost price, the card shows your profit and margin at the top. The SKU and Barcode are created for you when you save.
For a product with options, you set prices and stock for each option on the next screen instead (step 6).
4. Add photos and a video
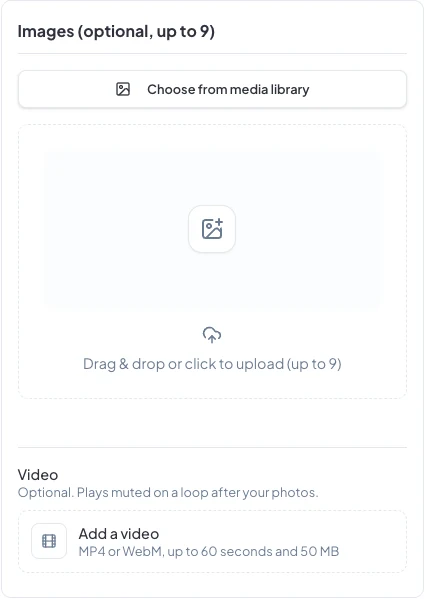
Under Images, drag your photos in or click Choose from media library. A product with one price can have up to 9 photos; a product with options can have up to 25, so each colour can have its own.
You can also add one short Video (MP4 or WebM, up to 60 seconds and 50 MB). It plays after your photos.
5. Choose where it sells, then save
Under Sales channels, Online store and POS are both on. Turn one off to hide the product there without affecting the other. You can also add the product to Collections, fill in its details and SEO, and use Generate with AI to draft the wording for you.
New products are saved as a Draft, which customers can't see. To put it on sale straight away, change Status to Published in the bar at the bottom of the page. Then click Create & continue.

6. Add options and variants
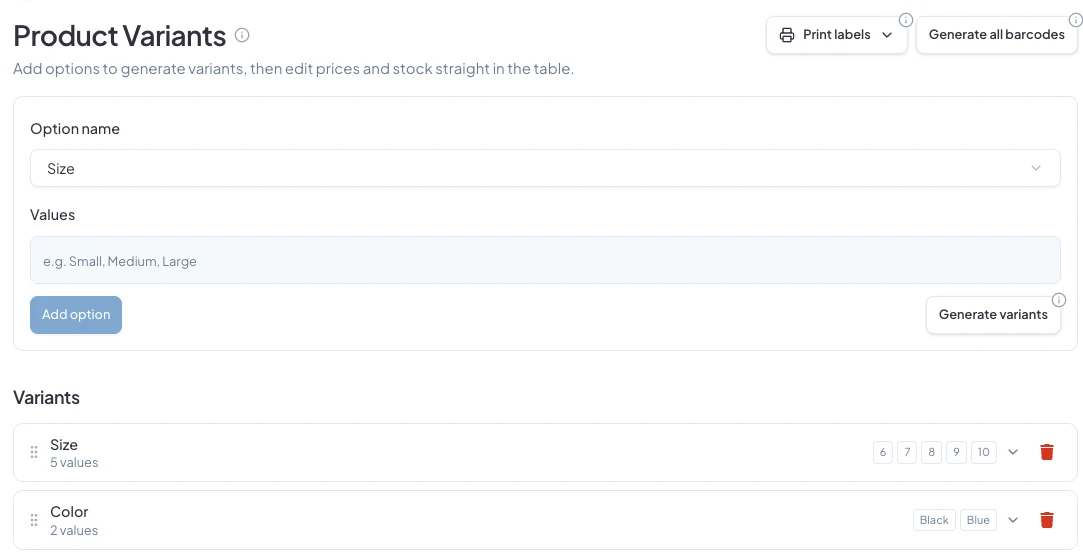
A product with options takes you to Product Variants next. Choose an Option name (Color, Size, Material, Style, Type, or Custom name… for anything else), type its Values separated by commas, and click Add option. For colours you can also pick swatches from your saved colours. Add as many options as you need, then click Generate variants.
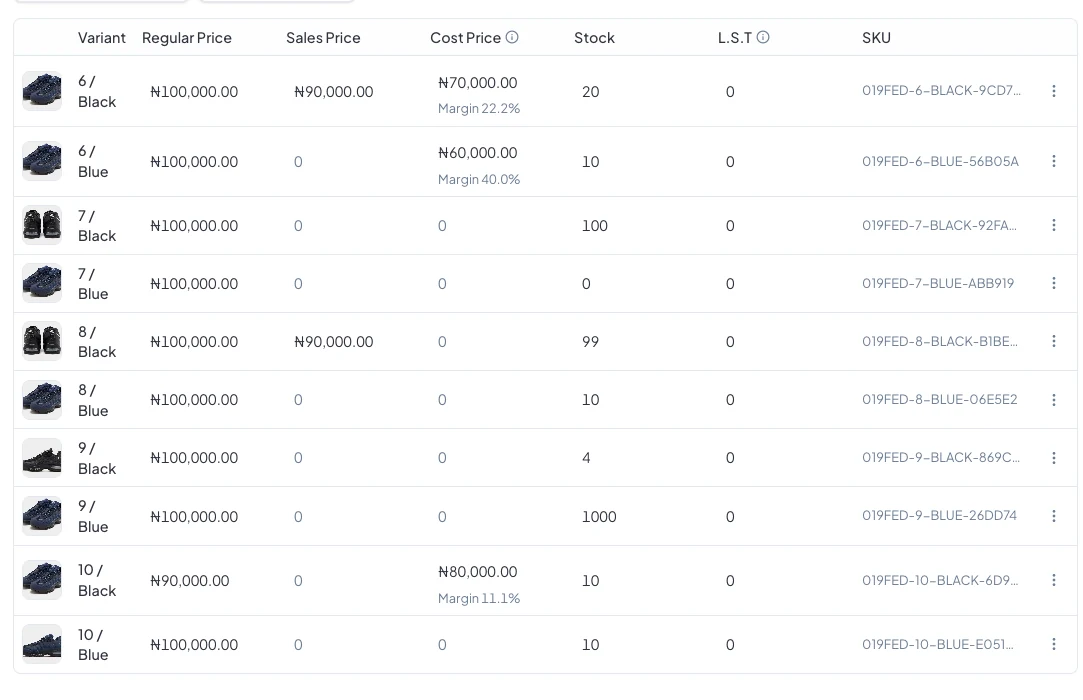
Every combination gets its own row. Set its Regular Price, Sales Price, Cost Price and Stock right in the table, and give it a photo.
Until a product with options has at least one variant, there's nothing for customers to buy.
Good to know
- A draft never appears on your store or the POS. Publish it when it's ready.
- To label stock, use Print labels on the Product Variants page to print a barcode for every variant.
- On your phone, open the Products tab in the SalesCenta app and tap +.
Did this answer your question? Contact support if you need more help.