
Last updated 9 Oct 2026
Choose a layout for your invoice PDFs, and add the business details, logo and footer note your customers see on them.
1. Open the invoice settings
Click the gear icon at the top right to open Settings, then choose Invoice Template under Documents. The Enable invoicing switch at the top right does the same job as the Invoices plugin.
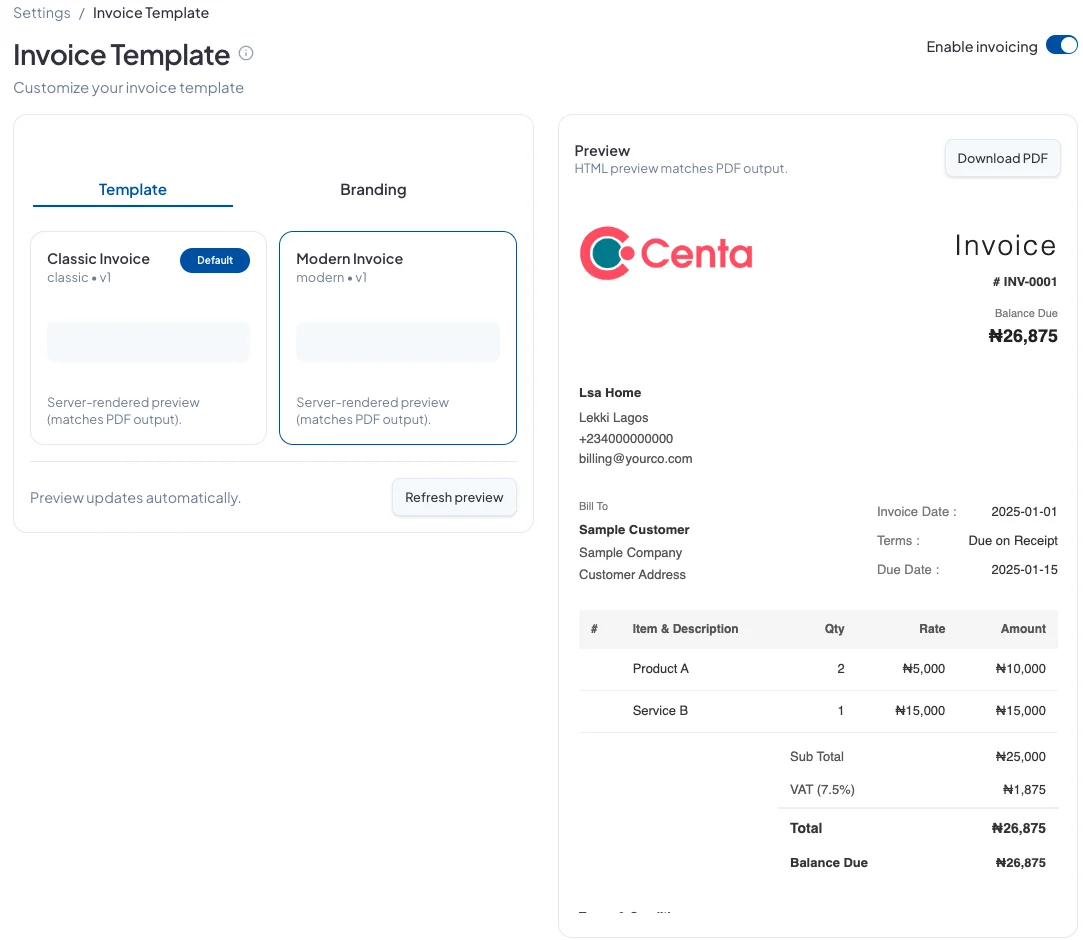
2. Pick a template
On the Template tab, choose Classic Invoice or Modern Invoice. The preview on the right shows how the PDF will look; click Download PDF to see a sample.
3. Add your details
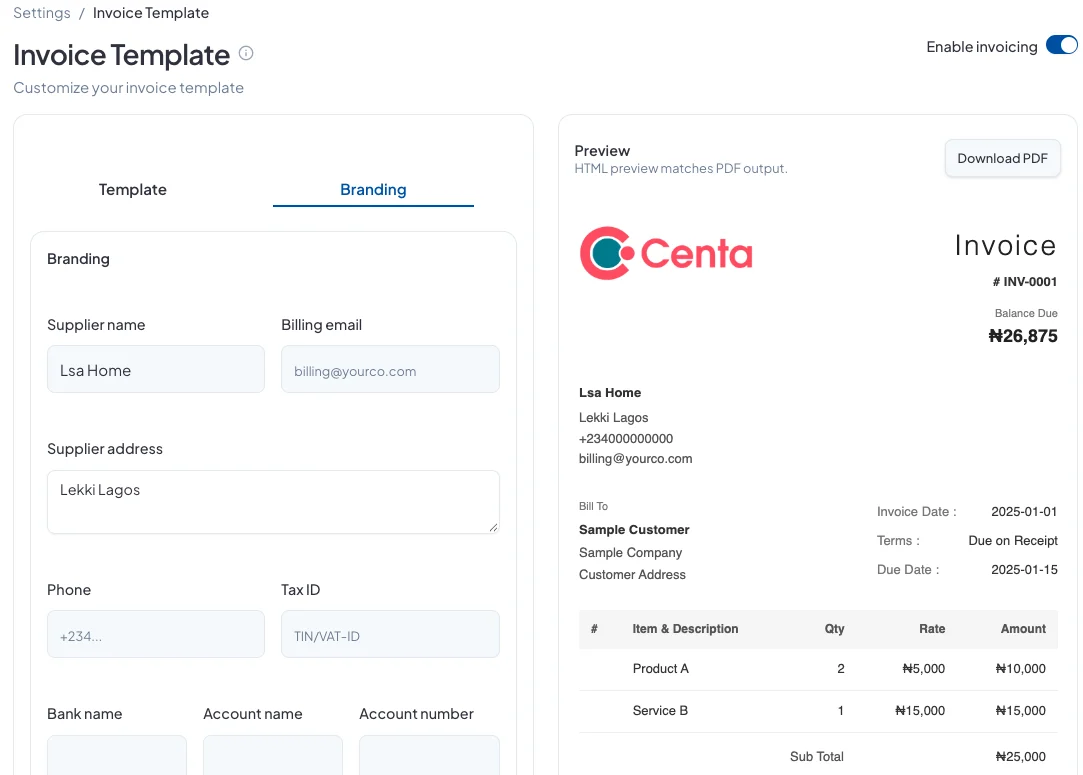
On the Branding tab, fill in what should appear at the top of every invoice: Supplier name, Billing email, Supplier address, Phone and Tax ID. Add a Footer note, such as Thank you for your business, then click Save changes. This also saves the template you picked.
4. Add your logo
Under Invoice template logo, upload your logo or choose one from your media library, then click Save logo.
Bank accounts
The bank accounts customers pay into are managed in one place and used across invoices, checkout and bookings. Click Manage bank accounts at the bottom of the Branding tab to add or change them.
Did this answer your question? Contact support if you need more help.